Hey there, kitchen adventurers! 👋 Are you looking for the best vegan chili recipe? One that’s great for freezing and tastes amazing? You’re in the right place! Making a delicious chili sin carne for freezing is more than just mixing ingredients. It’s an art that blends flavor, nutrition, and convenience.
Freezer-friendly meals are a big win for those who are always on the go. My vegan chili recipe will change how you do meal prep. It’s a hearty, protein-rich dish that’s still delicious after freezing. It’s perfect for anyone who loves plants or wants to eat less meat.
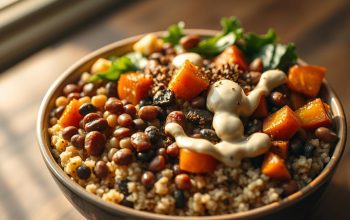
Here comes the recipe for Ultimate Vegan Chili sin Carne:
Get ready to explore bold flavors, healthy ingredients, and meal-prep magic. We’ll cover picking the right ingredients and freezing techniques. These will keep every bite of your chili sin carne perfect.
Let’s make your kitchen a plant-based flavor lab! 🌶️🥣
Why Choose Vegan Chili for Your Freezer Meals
Exploring meat-free chili can change your cooking game! It’s not just a trend; it’s a healthier, cheaper, and greener way to eat.
Health Benefits of Plant-Based Chili
Choosing a freezer-friendly meal like vegan chili is good for your body. It’s full of nutrients and offers many health benefits:
- High in plant-based protein
- Rich in fiber and essential vitamins
- Lower in saturated fats
- Supports heart and digestive health
“Eating plant-based doesn’t mean sacrificing flavor – it means embracing nutrition!” – Nutrition Experts
Cost-Effective Meal Prep Solution
If you’re watching your budget, vegan chili is a great choice. It’s cheaper than traditional chili. Here’s how it compares:
| Meal Type | Average Cost per Serving | Savings Potential |
|---|---|---|
| Meat-Based Chili | $4.50 | Base Price |
| Vegan Chili | $2.25 | 50% Savings |
Environmental Impact of Meat-Free Meals
Choosing vegan chili is good for the planet. It’s a way to make delicious meals that are also eco-friendly. Each vegan meal helps reduce carbon emissions and saves resources.
- Reduces water consumption
- Lowers greenhouse gas emissions
- Minimizes land use for agriculture
Ready to make your meal prep healthier, cheaper, and greener with vegan chili? Let’s keep exploring!
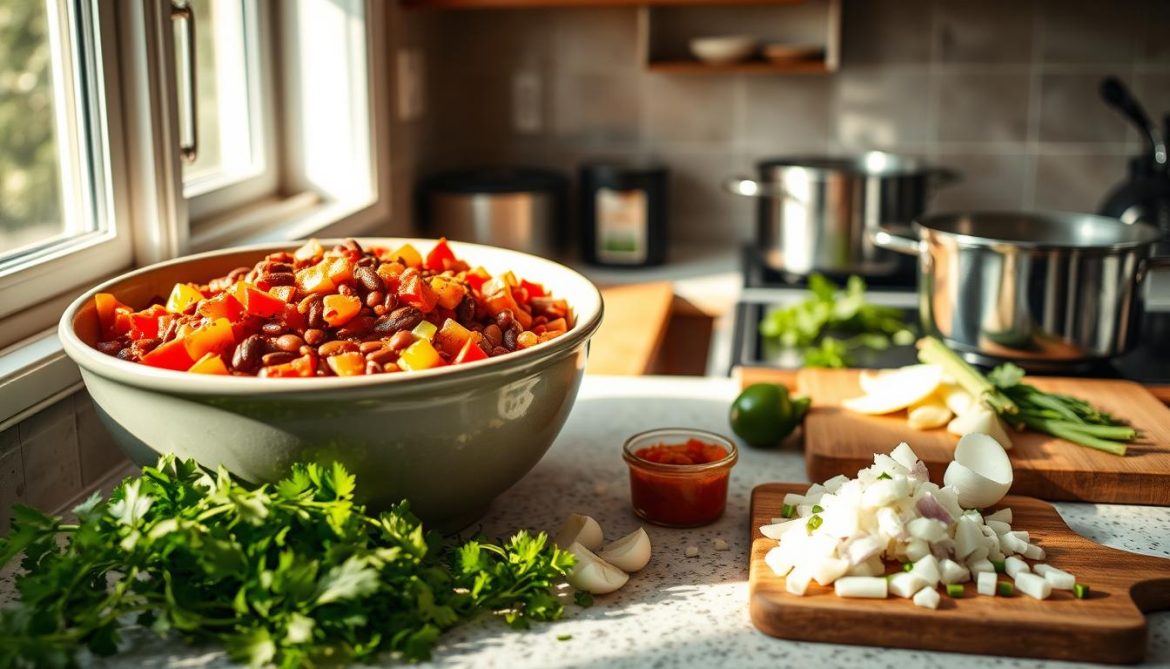
Essential Ingredients for the Ultimate Meatless Chili
Making the perfect vegetarian chili is an art. It starts with picking the right ingredients. Your journey to freezing meatless chili begins with a pantry full of flavors. These ingredients will turn a simple dish into a masterpiece.

Now, let’s explore the key ingredients for an amazing vegetarian chili:
- Protein Powerhouses:
- Black beans
- Kidney beans
- Textured vegetable protein (TVP)
- Lentils
- Veggie Superstars:
- Bell peppers
- Onions
- Zucchini
- Corn
The secret to a great meatless chili is layers of flavor. Spices are your allies here!
| Spice Category | Key Ingredients | Flavor Profile |
|---|---|---|
| Warming Spices | Cumin, Smoked Paprika | Deep, Earthy Warmth |
| Heat Builders | Chili Powder, Cayenne | Spicy Kick |
| Aromatic Herbs | Oregano, Cilantro | Fresh, Bright Notes |
“The magic of vegetarian chili is in its ability to surprise and delight – even meat-lovers will be asking for seconds!” – Kitchen Wisdom
Freezing tip: Pick ingredients that stay good when frozen. Beans and strong veggies are best for keeping texture and taste when reheating.
Chili sin Carne for Freezing: Complete Guide
Chili sin Carne
Nutrition
Equipment
- Large pot or Dutch oven
- Wooden Spoon
- Knife
Ingredients
For the Chili
- 2 tbsp olive oil
- 1 large onion diced
- 3 cloves garlic minced
- 1 red bell pepper diced
- 1 yellow bell pepper diced
- 2 medium carrots diced
- 1 zucchini diced
- 1 cup canned corn drained
- 1 can kidney beans 400g, drained and rinsed
- 1 can black beans 400g, drained and rinsed
- 1 can diced tomatoes 400g
- 1 can crushed tomatoes 400g
- 1 cup cooked lentils
- 2 cups vegetable broth
For the Seasoning
- 1 tbsp ground cumin
- 1 tbsp smoked paprika
- 1 tbsp chili powder
- 1 tsp oregano
- 1/2 tsp cinnamon
- 1 tsp salt
- 1/2 tsp black pepper
- 1/2 tsp cayenne pepper optional, for extra heat
For Garnish
- fresh cilantro chopped
- avocado slices
- lime wedges
- tortilla chips
Instructions
Sautéing the Vegetables
- Heat olive oil in a large pot over medium heat.
- Add the diced onion and garlic, sauté for 2–3 minutes until fragrant.
- Add the bell peppers, carrots, and zucchini. Cook for 5 minutes until slightly softened.
Adding the Spices
- Stir in cumin, smoked paprika, chili powder, oregano, cinnamon, salt, black pepper, and cayenne pepper.
- Cook for another 2 minutes, stirring frequently.
Simmering the Chili
- Add the canned diced tomatoes, crushed tomatoes, and vegetable broth to the pot.
- Stir in the kidney beans, black beans, lentils, and corn.
- Bring the mixture to a boil, then reduce the heat to low and let it simmer for 25–30 minutes.
- Stir occasionally to prevent sticking and allow the flavors to develop.
Adjusting the Flavor
- Taste the chili and adjust seasoning if needed.
- If you prefer a thicker consistency, let it simmer for an additional 10 minutes.
- For a spicier kick, add more chili powder or cayenne pepper.
Serving
- Ladle the chili into bowls.
- Garnish with fresh cilantro, avocado slices, and lime wedges.
- Serve with tortilla chips, rice, or crusty bread.
Tips and Variations
- Spicy Version: Add more cayenne pepper or a chopped jalapeño.
- Protein Boost: Stir in crumbled tofu or cooked quinoa.
- Smoky Flavor: Add 1 tsp of liquid smoke or roasted poblano peppers.
- Let the chili sit for a few hours or overnight for even better flavor.
- For a creamier texture, blend a portion of the chili and stir it back in.
- Store leftovers in an airtight container in the fridge for up to 5 days.
Mastering Portioning for Freezing
Portioning is key when freezing chili sin carne. Here’s what to do:
- Use 1-2 cup containers for individual servings
- Leave 1-inch headspace for expansion during freezing
- Opt for shallow, wide containers for faster cooling
Achieving the Perfect Cooking Temperature
The secret to a good freezable chili sin carne is in the temperature. Cook it at a steady low-medium heat, around 180-190°F. This keeps the ingredients together without losing texture.
| Cooking Stage | Recommended Temperature | Duration |
|---|---|---|
| Initial Sautéing | Medium (350°F) | 5-7 minutes |
| Simmering | Low-Medium (180-190°F) | 45-60 minutes |
| Final Resting | Room Temperature | 30 minutes |
Consistency Testing Techniques
A good freezable chili sin carne should be the right thickness. Test it by:
- Using a wooden spoon to check coating ability
- Ensuring sauce clings to ingredients
- Avoiding excessive liquid separation
“The perfect chili is like a culinary symphony – every ingredient plays its part!” – Kitchen Wisdom
By using these methods, you’ll make chili sin carne that freezes well and tastes fresh every time. Enjoy cooking!
Secret Spice Combinations for Authentic Flavor
Making the perfect vegan chili is like creating a work of art. It starts with a special mix of spices. The right spices can turn your chili from good to amazing, even when you freeze it.
“Spices are the soul of any great chili – they tell a story in every bite!” – Culinary Wisdom
Let’s explore the spice magic that will make your plant-based chili stand out!
Essential Spice Blend Components
- Smoky Paprika: Adds depth and rich color
- Ground Cumin: Provides earthy undertones
- Dried Oregano: Brings herbal brightness
- Chili Powder: Creates classic heat
- Cayenne Pepper: Adds optional spicy kick
The secret to a great vegan chili is finding the right balance of spices. Grinding whole spices first brings out their oils, making the flavors stronger.
| Spice | Flavor Profile | Recommended Amount |
|---|---|---|
| Smoked Paprika | Deep, Smoky | 1-2 tablespoons |
| Ground Cumin | Earthy, Warm | 2 teaspoons |
| Chili Powder | Spicy, Robust | 1-3 tablespoons |
Pro tip for chili sin carne for freezing: Mix your spices in advance and store in an airtight container to maintain maximum flavor intensity!
Try different spice amounts to make your vegan chili your own. The best thing about homemade spice blends is how they can turn a simple dish into a masterpiece.
Best Protein Alternatives for Traditional Meat
Making a tasty meat-free chili doesn’t mean you have to give up on protein or flavor! I’m excited to share some amazing plant-based protein options. They will make your vegetarian chili a hearty, satisfying meal.
Textured Vegetable Protein: A Game-Changer
Textured vegetable protein (TVP) is my secret for a meaty texture in vegetarian chili. It’s affordable and absorbs spices well, adding a lot of protein. Here’s why I love TVP:
- Mimics ground meat perfectly
- Low cost and easy to store
- High in protein and low in fat
Bean and Legume Power Combinations
For a protein-rich meat-free chili, mix different beans and legumes. These nutritional powerhouses add depth and complexity to your dish:
- Black beans and kidney beans
- Pinto beans with lentils
- Chickpeas and white beans
Modern Meat Substitutes Revolution
Today’s meat alternatives are culinary magic! From tofu to jackfruit, they can make your vegetarian chili taste like it’s from a restaurant. My top picks include:
- Crumbled firm tofu
- Shredded jackfruit
- Beyond Meat crumbles
“The secret to an amazing meat-free chili is layering flavors and textures!” – Plant-Based Chef
Proper Cooling and Freezing Techniques
Learning how to cool and freeze your meatless chili is key. It keeps the flavor and texture just right. To keep your meals tasty, you need to prepare them carefully.
“The secret to perfect freezer-friendly meals is in the cooling process!” – Culinary Pro
Now, let’s look at the important steps for freezing your Chili sin Carne:
- Cool the chili at room temperature for 30-45 minutes
- Avoid placing hot chili directly in the freezer
- Use shallow containers to speed up cooling
Freezing meatless chili needs extra care to avoid ice crystals. Spread the chili thinly to cool it fast and evenly.
| Cooling Method | Time | Effectiveness |
|---|---|---|
| Room Temperature Cooling | 30-45 minutes | Excellent |
| Ice Bath Method | 15-20 minutes | Very Good |
| Refrigerator Cooling | 1-2 hours | Good |
Pro tip: Always use airtight containers designed for freezer storage. This prevents freezer burn and keeps the chili’s flavor amazing!
Using quick cooling methods helps your meals stay tasty and nutritious. The trick is to be patient and prepare well before freezing your meatless chili.
Storage Solutions and Container Options
Batch cooking chili sin carne is a big win for meal prep fans! Storing it right is key to keep the flavor and quality top-notch.
Choosing the right containers is crucial for your chili. Let’s look at some great options that will keep your meals fresh and flavorful!
Best Freezer-Safe Containers
- Glass containers with tight-fitting lids
- BPA-free plastic containers with leak-proof seals
- Silicone freezer bags for space-saving storage
When picking containers for batch cooking, think about these important points:
- Durability under freezing temperatures
- Ease of stacking
- Simple cleaning process
Labeling and Dating Systems
Don’t lose track of your freezer meals! Set up a simple labeling system with:
- Dish name: Chili sin Carne
- Date prepared
- Portion size
Storage Duration Guidelines
Your chili can stay tasty for up to 3 months if stored right. Tip: Use clear containers to spot your meals easily!
“A well-organized freezer is the secret weapon of every home cook!” – Culinary Prep Master
Reheating Methods for Best Taste and Texture
Bringing your frozen vegan chili recipe back to life is an art. It can turn your freezer-friendly meals into something amazing! I’ve found some top techniques to make your Chili sin Carne taste like it’s brand new.
The microwave might seem fast, but the stovetop is better for flavor. Start by thawing your chili in the fridge overnight. Then, reheat it gently in a pot over medium-low heat. Stir now and then to avoid sticking and ensure it warms evenly. This slow method keeps the spices rich and the texture smooth.
For a better reheated chili, add a bit of vegetable broth. It brings back moisture and brightness. Top it with fresh cilantro, diced avocado, or nutritional yeast for a fresh touch. Each reheating method has its own benefits, so pick what fits your schedule and kitchen.
For top-notch results, let your chili simmer for 10-15 minutes. This lets the flavors blend and get stronger. If you’re short on time, the microwave works too. Just cover it and stir every minute to keep the heat even. Your freezer-friendly meals are now your secret to easy, tasty meals!