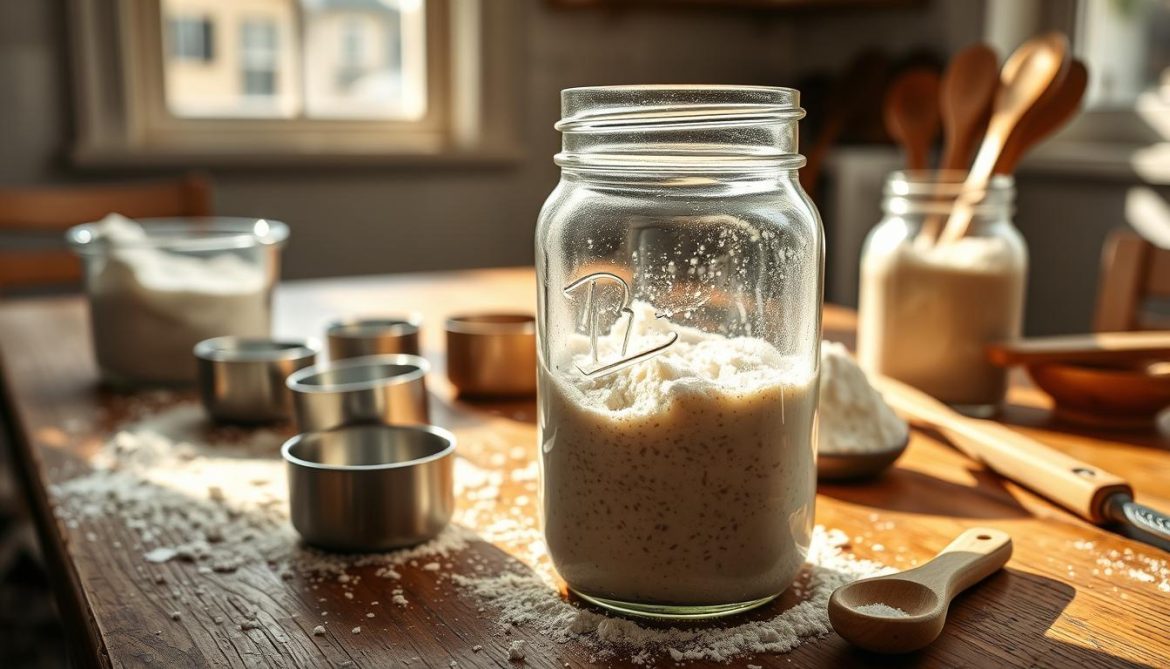
I love baking at home, especially sourdough bread. It’s amazing to watch wild yeast turn simple ingredients into a delicious loaf. If you’re excited to try sourdough baking, making your own starter is a great first step.
In this guide, I’ll show you how to make a healthy sourdough starter from scratch. You’ll learn about wild yeast, the ingredients and tools you need, and how to keep your starter alive. By the end, you’ll be ready to start baking sourdough bread that’s truly special.
Key Takeaways
- Sourdough starters harness the power of wild yeast and natural fermentation for exceptional flavor and texture in homemade bread.
- Creating a sourdough starter at home is an rewarding and cost-effective alternative to store-bought starters.
- Understanding the science behind wild yeast cultivation and natural fermentation will help you cultivate a healthy, robust starter.
- Choosing the right flour, water, and feeding schedule is crucial for a successful starter development.
- Proper maintenance and troubleshooting techniques will ensure your sourdough starter thrives long-term.
Understanding the Magic of Wild Yeast and Natural Fermentation
Exploring sourdough starters reveals a fascinating world. It’s all about the teamwork between wild yeast and lactic acid bacteria. These tiny wonders turn simple ingredients into the delicious flavors and textures we love in artisanal breads.
The Science Behind Wild Yeast Cultivation
Wild yeast grows naturally in our environment. It finds a cozy home in flour and water, making up a sourdough starter. As we care for the starter, these yeasts grow, eating sugars and starches. They release carbon dioxide, making sourdough rise and giving it a light crumb.
How Lactic Acid Bacteria Works
Lactic acid bacteria work alongside wild yeast in fermentation. They eat what the yeast leaves behind, turning sugars into lactic acid. This creates sourdough’s tangy taste and helps keep the bread fresh by stopping bad bacteria.
Natural Fermentation Process Explained
The natural fermentation is a beautiful dance. Wild yeast and lactic acid bacteria together transform dough into sourdough. As we feed and care for the starter, this team unlocks the flour’s potential, creating a unique culinary treasure.
“The natural fermentation process is a delicate dance, where wild yeast and lactic acid bacteria work in perfect harmony to create the unique flavors and textures we cherish in sourdough.”
Essential Ingredients for Your Homemade Sourdough Starter
Making a sourdough starter at home is a fun journey. It starts with the right ingredients. The key to a great starter is using bread flour and water of high quality. Let’s explore the must-haves for a lively starter culture.
High-Quality Bread Flour
The base of your sourdough starter is the flour. Choose a high-quality bread flour that’s full of gluten and nutrients. This flour is perfect for the wild yeast and bacteria to grow, making your starter strong and tasty.
- Find a flour with 12-14% protein for a strong starter.
- Organic or whole-grain bread flour adds nutrition and flavor.
Fresh, Clean Water
The second key ingredient is water. The water’s quality affects your starter’s growth. Use fresh, clean, and chlorine-free water to help your starter grow well.
- Filtered or spring water is best because it’s pure and free of minerals.
- If your tap water tastes strongly of chlorine, let it sit for 24 hours to remove the chlorine.
By mixing high-quality bread flour and fresh water, you’re setting up a thriving starter culture. This starter will be the heart of your sourdough baking.
“The secret to a successful sourdough starter lies in the quality of the ingredients you use.”
Choosing the Right Flour for Your Starter Culture
As a home baker, I’ve found that flour type greatly affects your sourdough starter. The right flour is key to a healthy starter and a great loaf. It’s all about starting with the right flour.
Different Types of Flour and Their Effects
Not all flours are the same for sourdough starters. Bread flour is great because it has more protein. This helps the starter ferment well. Organic flour is also good, as it has more nutrients and enzymes for better flavor and texture.
Whole grain flour adds a rich, complex taste to your starter. It has bran and germ, making the starter tangy and robust. This is perfect for those who love a more artisanal sourdough.
Organic vs. Conventional Flour Options
Choosing between organic and conventional flour depends on what you prefer and need. Organic flour is healthier because it’s grown without harmful chemicals. It’s richer in nutrients, which can help your starter grow better.
Whole Grain Benefits in Starter Creation
Using whole grain flour in your starter has many benefits. It’s full of fiber, vitamins, and minerals. These nutrients feed the yeast and bacteria, making your starter more flavorful. The bran and germ also improve your bread’s texture and crumb.
Choosing the right flour for your starter is a personal choice. Try different types and blends to find what works best for you. By understanding flour differences, you can make a starter that leads to amazing homemade bread.
The Perfect Water Temperature and Quality Matters
Creating a thriving sourdough starter depends on the water’s quality and temperature. The water you choose can greatly affect the fermentation process. This, in turn, influences the taste and texture of your sourdough bread.
The best water temperature for your sourdough starter is between 70°F to 85°F (21°C to 29°C). This range is perfect for the yeast and bacteria to grow well. If the water is too cold, fermentation slows down. Water that’s too hot can harm or kill the microorganisms.
The water’s quality is also key. Use filtered, dechlorinated water to avoid chlorine and impurities. Distilled or spring water is great too, as they don’t have chemicals that can mess with fermentation.
- Maintain a water temperature between 70°F to 85°F (21°C to 29°C) for optimal starter growth
- Use filtered, dechlorinated, distilled, or spring water to ensure a healthy fermentation
- Avoid tap water, as the chlorine and impurities can negatively impact the fermentation process
By focusing on the right water temperature and quality, you’ll create a healthy sourdough starter. This starter will be the base for your bread-baking journey.
Step-by-Step Guide to Creating Your Sourdough Starter
Starting a sourdough starter is an exciting adventure. It opens up a world of tasty baking. This guide will help you make your own sourdough starter. It’s the key to making delicious homemade bread.
Day-by-Day Feeding Schedule
It’s important to feed your sourdough starter regularly. Here’s a simple routine:
- Day 1: Mix equal parts flour and water in a clean jar. Cover it and let it sit at room temperature for 24 hours.
- Day 2: Throw away half of the starter. Feed the rest with equal parts flour and water. Cover it and let it sit for 24 hours.
- Days 3-7: Keep repeating the process of discarding half and feeding the rest. Let it ferment for 24 hours between each feeding.
Signs of Successful Fermentation
As your starter grows, you’ll see some cool changes:
- Bubbles and Expansion: A healthy starter will get bubbly and double in size in a few hours after feeding.
- Tangy Aroma: It will start to smell pleasant and slightly sour.
- Increased Acidity: The starter’s pH will go down, showing it’s working well.
Troubleshooting Common Issues
Creating a sourdough starter can sometimes have challenges. Here are some common problems and how to fix them:
| Issue | Possible Causes | Solution |
|---|---|---|
| Slow or No Fermentation | Incorrect flour, water temperature, or feeding schedule | Adjust the flour type, water temperature, or feeding frequency |
| Off-Odors | Contamination, improper storage, or overfeeding | Discard the starter, clean the jar, and restart with fresh ingredients |
| Mold Growth | Inadequate starter maintenance, high humidity, or exposure to air | Discard the moldy starter, clean the jar, and restart with proper care |
Creating a sourdough starter takes patience and effort. But the rewards are amazing. With this guide, you’ll be on your way to a thriving starter. It will be the base for your homemade bread adventures.
Equipment and Tools You’ll Need
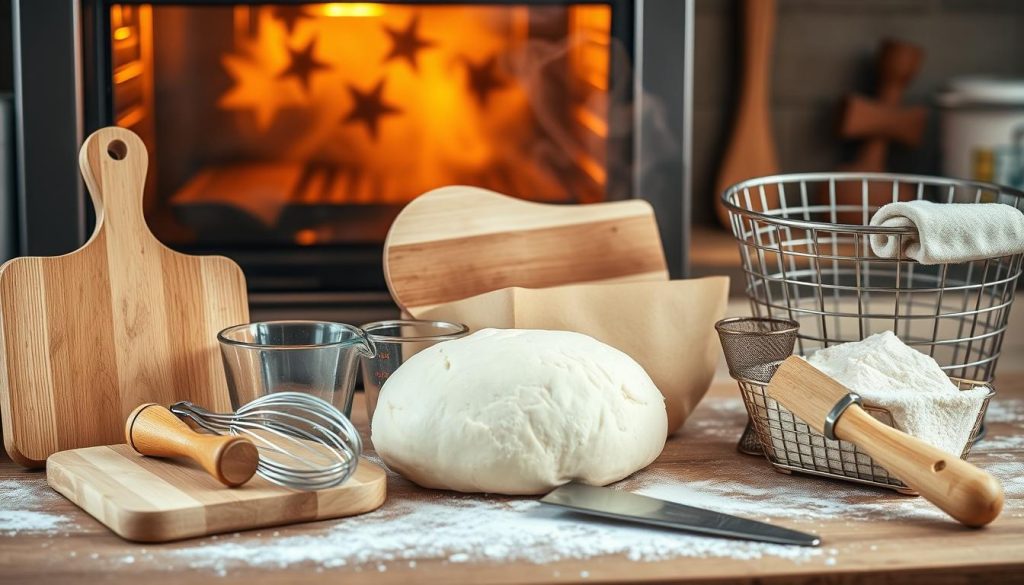
To make a sourdough starter, you need some basic tools and equipment. As a bread baker, I’ve found that the right tools are crucial. They help your starter culture grow well. Here are the must-haves for your sourdough starter journey.
The Basics:
- Glass jar or container with a lid – This will be your starter’s home. Choose a jar that’s at least 32 oz (1 quart) in size to allow for growth.
- Rubber band or clip – Use this to mark the jar’s starting volume level, which will help you track the starter’s rise and fall.
- Wooden spoon or spatula – For stirring and mixing your starter during feedings.
- Digital kitchen scale – Accurate measurements are key for maintaining the right flour-to-water ratio.
- Water bottle or pitcher – For measuring and adding water to your starter.
Optional but Helpful:
- Cheesecloth or towel – To cover the jar and allow air circulation.
- Thermometer – Monitoring the temperature of your starter’s environment is crucial for optimal fermentation.
- Spray bottle – Useful for lightly misting the top of your starter to prevent a dry crust from forming.
- pH meter – This tool can help you monitor the acidity levels of your starter, which is an indicator of its health.
With these essential items, you’ll be well on your way to cultivating a thriving sourdough starter culture right in your own kitchen. Remember, the key is to start simple and gradually expand your toolkit as your bread baking skills and sourdough expertise grow.
Understanding the Feeding Schedule and Ratios
Keeping your sourdough starter healthy is all about a regular feeding schedule and the right mix of flour, water, and starter. This is key to keeping your starter lively and ready to add flavor and rise to your bread.
Morning vs. Evening Feeding Times
When you feed your starter can really matter. Many bakers like to feed theirs in the morning. This way, the starter is at its peak by the time they bake later in the day. Others prefer evening feedings. Try different times to see what fits your life best.
Adjusting Ratios for Different Climates
- In warm places, a 1:1:1 starter, flour, and water mix helps avoid over-fermentation.
- In cooler areas, a 1:2:2 flour ratio keeps the starter active and rising well.
- Watch how your starter reacts and adjust the mix to match your climate perfectly.
| Climate | Starter : Flour : Water Ratio |
|---|---|
| Warm | 1 : 1 : 1 |
| Cool | 1 : 2 : 2 |
The starter maintenance and feeding schedule are the heart of a thriving sourdough. By focusing on these, you’ll be baking tasty sourdough at home in no time.
Signs of a Healthy and Active Starter
As a passionate home baker, I’ve learned that a healthy sourdough starter is key to making delicious bread. A thriving starter shows the power of natural fermentation and the magic of wild yeast. Let’s look at the signs that your starter is doing well.
A healthy starter should smell nice, with a yeasty, fruity scent. If it smells sour or alcoholic, it might need some changes.
A lively starter will show lots of bubbles when you stir it. This means the yeast and bacteria are working hard, which is good for fermentation.
| Characteristic | Healthy Sourdough Starter | Unhealthy Sourdough Starter |
|---|---|---|
| Aroma | Slightly yeasty, somewhat fruity | Sour, alcoholic, unpleasant |
| Appearance | Robust, bubbly, and active | Flat, lifeless, and inactive |
| Texture | Smooth, stretchy, and pliable | Lumpy, dry, and difficult to stir |
A healthy starter should also feel smooth and stretchy. It should be easy to mix with new ingredients. If it’s dry or hard to stir, it’s time to adjust your feeding.
Watching your starter’s smell, look, and feel helps keep it healthy. A lively starter is essential for making perfect homemade sourdough bread, full of natural flavors and aromas.
Common Mistakes to Avoid in Starter Creation
Making a sourdough starter is like an art. It’s important to watch the temperature and feeding times closely. This helps your fermentation starter grow well.
Temperature Control Errors
Keeping the right temperature is key for a healthy sourdough starter. If it’s too hot or too cold, it can slow down or stop the fermentation. Try to keep it between 70-85°F (21-29°C) for best results.
Feeding Schedule Mishaps
- Not feeding at the same time every day: This can mess up your starter’s balance. Try to feed it at the same time each day.
- Forgetting to feed on weekends: Even when you’re busy, don’t skip weekend feedings. Not feeding can make your starter weak or even kill it.
- Using the wrong flour to water ratio: Finding the right mix is important. It keeps your starter lively and active.
By avoiding these mistakes, you can make a strong and reliable sourdough starter. It will be the base for your tasty homemade breads.
Maintaining Your Sourdough Starter Long-Term
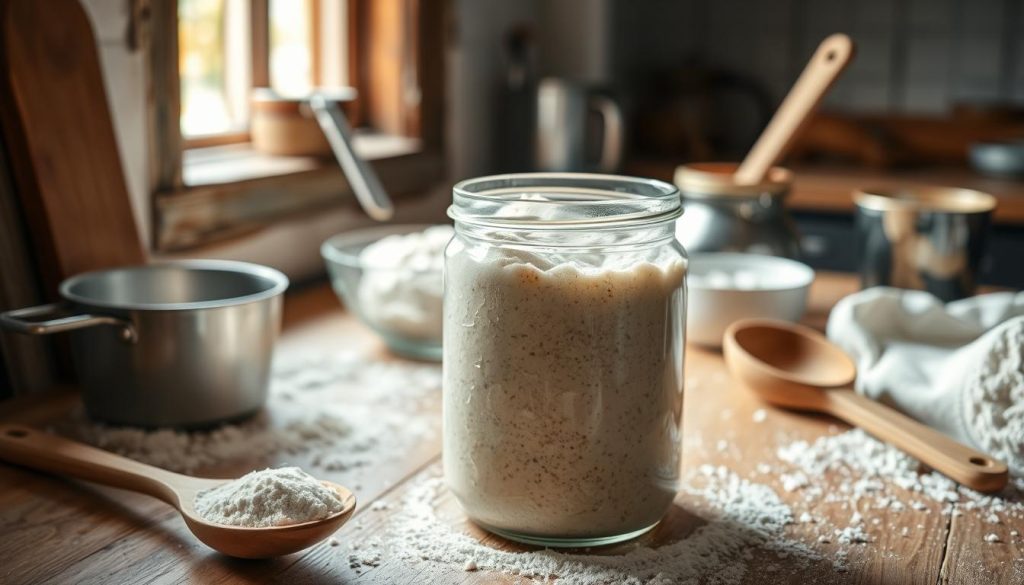
Keeping your sourdough starter healthy is key to baking amazing bread at home. I’ve found that with the right care, your starter can thrive for years. Here are the main steps to keep your starter in top shape.
Consistent Feeding Schedule
Feeding your starter regularly is crucial. I feed mine twice a day, in the morning and evening. This keeps it active and ready for baking.
Optimal Storage Conditions
When you’re not using it, store your starter in the fridge. It slows down fermentation and cuts down on feedings. I use a container with a loose lid to let gases escape.
Reviving Your Starter
Don’t worry if your starter seems slow. You can revive it with fresh flour and water. Just throw away some starter, then feed it with flour and water. Soon, it will be bubbly and lively again.
| Starter Maintenance Tips | Benefits |
|---|---|
| Consistent Feeding | Keeps the starter active and healthy |
| Refrigerator Storage | Slows down fermentation and reduces feeding frequency |
| Reviving a Neglected Starter | Restores activity and vitality to the levain |
By following these easy steps, you can keep your sourdough starter happy and healthy. A well-cared-for starter is essential for baking delicious bread at home.
Storing and Reviving Your Starter
Keeping your sourdough starter healthy is key for great baking. You might need to store it when you’re not baking. Knowing how to store and revive it is important.
Refrigeration Methods
Proper refrigeration is crucial for your starter. Move it to a clean, airtight container and put it in the fridge. This slows down fermentation, letting it stay dormant for weeks. Feed it before refrigerating to keep it nourished.
Reactivation Techniques
To bake again, just revive your starter. Take it out of the fridge, toss half, and feed it with flour and water. Let it sit at room temperature for 8-12 hours until it’s bubbly. You might need to feed it a few times to get it fully active.
| Refrigeration Period | Reactivation Steps |
|---|---|
| 1-2 weeks |
|
| 2-4 weeks |
|
| 4-6 weeks |
|
With a bit of care, your sourdough starter can be stored and revived. This ensures you always have natural leavening for your baking.
Advanced Tips for Starter Enhancement
Mastering a healthy sourdough starter culture is just the beginning. To take your baking to the next level, try some advanced techniques. These can really make your homemade artisan bread starter stand out.
One exciting way to improve your starter is by trying different flours. While all-purpose or bread flour is a good base, adding whole grains like rye or whole wheat can add flavor and texture.
- Try mixing 50% all-purpose flour with 50% whole wheat for a more complex starter.
- Add a bit of specialty flours like spelt or einkorn for unique tastes.
- See how different flours change your starter culture‘s rise, fermentation, and taste.
Adjusting the starter’s hydration level is another way to enhance it. The standard 100% hydration is a good start, but changing the water-to-flour ratio can open up new possibilities.
- Try a slightly higher hydration, around 110-120%, for a lighter, airier artisan bread.
- Lower the hydration to 90-95% for a denser starter that works well with heavier doughs.
- Notice how changing hydration affects dough handling and fermentation times.
Perfecting your sourdough starter is a journey of trial and error. Be open to experimenting and let your creativity flow. This will help you unlock the full potential of your homemade artisan bread starter.
Troubleshooting Your Starter Problems
Keeping a sourdough starter healthy and active is rewarding but can be tricky. You might face some challenges on your sourdough journey. But don’t worry, with some troubleshooting, you can fix your sourdough starter issues.
Dealing with Mold and Off-Odors
Mold or off-odors in your starter can be a worry. But, it’s not a reason to panic. Mold usually means your starter has been neglected or exposed to bad conditions. To fix this, you need to throw away the bad starter and start again with a new one.
- Remove any visible mold or discolored areas immediately.
- Thoroughly clean the container and utensils with hot, soapy water to eliminate any lingering spores.
- If the off-odor is strong, it’s best to start over with a new sourdough starter culture.
Fixing an Inactive Starter
An inactive or slow starter is another common problem. It might happen if you haven’t fed it often or if the environment isn’t right. To make your starter active again, try these steps:
- Increase the feeding frequency, gradually moving to a twice-daily schedule.
- Ensure the starter is being maintained at the ideal temperature range, typically 70-85°F.
- Consider adjusting the flour type or water temperature to better suit the needs of the lactobacillus bacteria in your starter.
With patience and care, you can revive your sourdough starter. It will soon be ready to make tasty baked goods.
Creative Ways to Use Your Starter Discard
As a passionate home baker, I’ve found many ways to use sourdough starter discard. It’s not just for throwing away. You can turn it into tasty treats with a bit of creativity. Here are some of my favorite recipes to make you look forward to refreshing your sourdough starter.
Sourdough Discard Pancakes and Waffles
Start your day with sourdough discard pancakes or waffles. They’re tangy and light, thanks to the starter. Add fresh fruit, maple syrup, or your favorite toppings for a special breakfast.
Savory Sourdough Biscuits and Crackers
Make flaky biscuits or crisp crackers with your discard. They’re savory and pair well with soups or as a snack. Try adding herbs, spices, or cheese for a unique artisan bread taste.
Sourdough Discard Muffins and Scones
Turn your discard into delicious muffins and scones. They’re great for breakfast, brunch, or a snack. Add berries, nuts, or chocolate chips for extra flavor.
Now, you won’t have to worry about what to do with your sourdough starter discard. Use your creativity and enjoy every bit of your sourdough discard.
When Your Starter is Ready for Baking
The moment you’ve been waiting for is here – your homemade sourdough starter is ready for your first loaf of artisan bread! But how do you know it’s ready? Let’s look at the signs that show your starter is ready to bake.
One key sign is when your starter doubles in volume in 4-8 hours after feeding. This shows the wild yeast and bacteria are working well. You’ll also see bubbles and a domed shape, which means your starter is strong and active.
The starter’s smell is also important. A healthy starter smells sour and yeasty but not bad. When it smells right, it’s time to start baking your first loaf.
